Monday, May 31, 2010

Memorial Day Barbecue Burger

I think it was sometime in 1987 and I was reading a Babysitter's Club book when it hit me - I'd been born in the wrong country.

For a little girl in a little Australian town, these books filled with tales of cherry-flavored candy and Xerox machines and New York and Tootsie Rolls and Twinkies and grape juice sounded exactly like a glorious wonderland where I needed to be. It started a lifelong obsession love affair with all things red, white and blue. And nothing's changed.

I've always called my mother mom, spelled color without the "u" and preferred Dr Pepper to any other soda. Yes, soda. not soft drink. I may be insane (and don't hassle me about not loving my country, because I do), but it has definitely been the instigator of my deep and abiding adoration of American recipes.

And so, I have adopted all the American holidays as my own, as they're a great excuse to get stuck into some real down-home favourites. Which is why today I've made barbecue burgers for Memorial Day. I may not be American, I may not be in America, but darned if you're not gonna let me cook American!

This recipe is from the National Barbecue Association of America. They seem like they'd probably know what they're doing with a grill.


Easy three-cup barbecue sauce


Combine the following liquids:
1 cup water           
½ cup cider vinegar            
¼ cup canola oil            
¼ cup Worchester sauce           
¼ cup lemon juice            
1 tablespoon honey            
2 dashes of Tabasco Sauce
Add the following items:
1 onion, finely chopped            
4 cloves of minced garlic            
2 cups of ketchup            
1/3 cup of dark brown packed sugar (can substitute molasses)            
1 tablespoon of chili powder            
1 tablespoon of ground cumin            
Optional:  Chopped JalapeƱo pepper with seeds removed.
Directions:
1. Pour contents into sauce pan and bring to a boil, reduce heat and simmer about 15 minutes until solution thickens (I boiled mine as I wanted it to be really rich and thick, enough to totally coat my burger).
            

2. Strain contents through fine mesh and adjust seasonings to taste: salt/pepper/etc. (didn't bother...)
            • 
3. Use immediately or refrigerate up to a week.

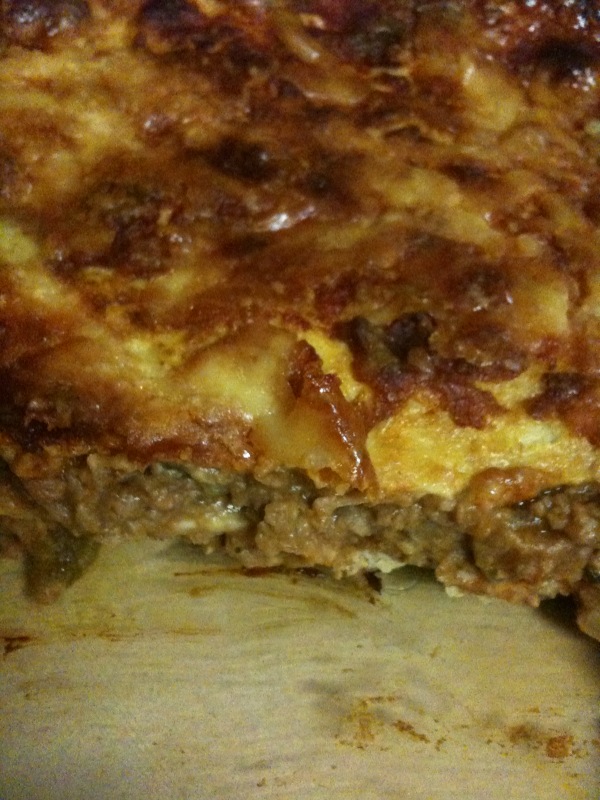
I soaked my veggie patty in the sauce for a little bit, before popping on a toasted bun. Too delicious!

Masterchef George's raw vegetable salad

Oh dear. I love salad, but this one is just a cut above the rest. I made and ate the whole thing. Solo.

And I don't apologise.


Ingredients

1 Lebanese cucumber, quartered lengthways, seeds removed, cut on an angle
1 Dutch carrot, thinly sliced on an angle
2 radishes cut into 2mm rounds
2 spring onions, finely sliced
¼ cup freshly shelled peas 
8 grape tomatoes, halved lengthways
1 tbs pistachios, roasted
1 tbs capers, rinsed and drained
2 dried Iranian figs, finely sliced
1 flatbread, rubbed with sumac and olive oil, baked 
pinch sumac
1/3 cup parsley leaves
1/3 cup feta, crumbled
extra virgin olive oil, for drizzling
½ lemon, juiced


Method


1. Mix all ingredients in a bowl until combined. Gently, people.


2. Drizzle with olive oil and lemon juice. Being a lemon freak, I was concerned this amount was not going to be enough. How dare I doubt George's expert advice... it was perfect.

Masterchef Hommus

It's no secret I love Masterchef... I don't watch a lot of television (too many books in the world, not enough time) but last season, I was hooked. I dominated the remote every day at 7.30pm and woe betide anyone who came near.

This year is no different, and just about everything shown in the masterclasses make me immediately hungry. This hommus recipe, and the one for raw vegetable salad which is coming up next, actually had me moaning at the television... I needed to eat them immediately, if not sooner. And boy, when I made them, I thought my head was going to explode. They were painfully good.

Without further ado, here is Gary's recipe for hommus.


Ingredients

400g can chickpeas, rinsed and drained
½ garlic clove, bruised
1 tbs tahini
pinch mild paprika
½ cup extra virgin olive oil
1 lemon, juiced, ½ zest finely grated


Method


Blend, baby! Add a bit of water at the end if it's too sticky. I added about two tablespoons. And then I died when I tasted it.

Eggplant Parmigiana

I'm just going to get it out there right now - spaghetti Bolognese ruined "Italian" food for me. Anything vaguely tomatoe-y, and I  studiously ignore it and hope it goes away.

I've grown and evolved and grown accustomed to various things now, but spaghetti Bolognese is not and never will be one of them. In the same vein is anything parmigiana. But if you're putting crispy-crumbed eggplant in there, and cheese is involved, I'm not going to say no! Parmigiana is, in most people's view, delicious. As is this one.


Now you can either make this the way I do... one layer... but I don't know that it is strictly kosher. I think the "done" thing is to layer it. You can do whatever you like, it'll still taste good!

Ingredients

1 eggplant, sliced into 'fillets'

1 egg

breadcrumbs with grated parmesan, dried oregano, salt and pepper mixed in

Olive oil

1 quantity tomato sauce (recipe follows)

cheese

TOMATO SAUCE:

1 onion, diced finely

1 clove garlic, minced

1 can diced tomatoes

1 teaspoon tomato paste

1 teaspoon balsamic vinegar

pinch sugar, salt and pepper

whatever Italian herbs you want to throw in


Method

1. Dip each eggplant fillet in the egg, and then into the breadcrumbs to coat.

2. Leave to sit for a bit to enable the coating to stick.

3. Make the tomato sauce: saute the onion in olive oil until translucent. Add the garlic and saute for about a minute. Add a the tomatoes, tomato paste, vinegar, sugar, salt, pepper and herbs. Bring to a boil and then simmer for the time it takes for you to fry the eggplant - 15-20 minutes or so.

4. Heat a fair amount of olive oil in a large frying pan - Anywhere from 1/4 to 1/2 a cup. These suckers um... suck up a lot of oil! Get it fairly hot and place the crumbed eggplant in an even layer. When it is golden brown underneath, you can flip them over, and turn the heat down to medium, medium-low. The aim is here to cook them through without burning the outside.

5. Preheat your grill/broiler.

6. Place the cooked eggplant in a layer, spoon over the sauce and add cheese to the top. Stick under the gill/broiler until cheese is golden brown and bubbly.

Super-Easy Eggplant Parmigiana

Friday, May 28, 2010

Food blogging

Today Miss Annabel Candy and I are kicking it old-school and are featured in the Sunshine Coast Daily newspaper talking about food and blogging... two of my favourite topics :)

Monday, May 24, 2010

Peach Cobbler

Now, before we get started, I'd like to pay homage to Paula Deen, my butter Queen. She is just the cutest thing to wield a whisk, and her southern accent makes me immediately want to go to Georgia and drink sweet tea and sit on someone's porch y'all. Preferably on white furniture. Or a swing.

Paula makes the most gorgeous food, and I love that they're not always diet-friendly. I remember once when Oprah asked her about her high-calorie dishes, she said "Honey, I'm your chef, not your doctor!". Well Amen, Miz Deen.

Here is my attempt at her Peach Cobbler served at her restaurant. I've photographed it cold so it's more cakelike in this picture, but when it comes out of the oven and its all sweet and gooey and buttery, it is just divine. And a little less rigid haha.


Ingredients

4 cups peeled, sliced peaches; 2 cups sugar, divided; 1/2 cup water

(or 1 can sliced peaches in juice)

8 tablespoons butter

1 1/2 cups self raising flour

1 1/2 cups milk

cinnamon

Method

1. Preheat oven to 185 C

2. Combine the peaches, one cup sugar and water in a saucepan and mix well. Bring to a boil and simmer for 10 minutes. You can omit this step if using canned peaches.

3. Put the butter in a square baking dish and place in oven to melt.

4. Mix remaining 1 cup sugar, flour and milk. Pour mixture over melted butter, but don't stir.

5. Spoon fruit on top, with syrup/juice. Sprinkle with ground cinnamon.

6. Bake for 30-45 minutes. The batter will rise to make a cake-like topping. Um... delicious!


Recipe from here or you can watch Paula in all her Southern glory make it here. Uber-cute!


Friday, May 21, 2010

Gnocchi with lemon cream and basil

Yes, I'm afraid of tomato-based pasta sauces and will nine times out of 10 choose a creamy one.

I promise, there will be a low-fat pasta sauce on this blog at some point in my life.


Ingredients

1/2 cup stock

300ml cream

1 teaspoon lemon zest

1 clove garlic, minced

Pepper

a handful of spinach (or more if you want... it wilts down dramatically)

1/2 cup parmesan

8-10 basil leaves, chiffonade (sliced thinly) or torn (better option)

gnocchi

Method

1. Put stock, cream, zest and garlic into a frying pan and boil vigorously until reduced to about half. The sauce needs to be fairly thick to coat the pasta. It will take 10-15 minutes. Be careful not to let it boil over!

2. Add pepper, 1/2 cup parmesan, spinach and most of the basil, reserving some for the top.

3. Cook gnoochi according to packet directions and drain. Add to the sauce.

4. I like to serve mine with chopped fresh tomato on top with the remaining basil and a serve of garlic bread.

The Julie/Julia Project

This movie/book/blog comes up a LOT when I mention I have a food blog.

I can totally understand... food blogs have become the hobby du jour, and this Project is the most tangible of the lot.

So, as part of an article on food bloggers I'm writing for my day job, this weekend I'm going to do my own Julie/Julia style project. I'm going to read the blog from start to finish. That's two years worth of almost-daily posts.

Lucky the weather's terrible anyway.

Thursday, May 20, 2010

Thai Barbecue Eggplant

This really is more Thai than Barbecue, but if we can combine the two well then, hell... everybody wins.


Serves 2

Ingredients

1 large eggplant

2 tablespoons olive oil

1 tablespoon fresh lemon juice

1 clove garlic

1 small chili

100g palm sugar

1 tablespoon light soy sauce (fish sauce for all you non-veggie/Thai enthusiasts)

1 tablespoon fried onion (I omitted... too much work)

Fresh coriander/cilantro to serve


Method

1. Peel skin off the eggplant and cut lengthways into quarters.and then lengthways again until you make strips.

2. Heat barbecue plate or frying pan and add a few drops of olive oil. Cook eggplant until golden brown, turning fairly regularly.

Sauce

1. In a small bowl, heat the soy/fish sauce and palm sugar for 20 seconds in the microwave until dissolved.

2. Finely chop the chili and garlic and add to the bowl. Stir in the lemon juice last.

3. Taste sauce and ensure it has a good blend of salty, sweet and sour.


I served it with jasmine rice and it was awesome.

Recipe adapted from Yum Eggplant that appeared in The Courier-Mail. The recipe was originally from Mons Thai Ranaharn in Windsor.

Monday, May 17, 2010

Raspberry and Lemon Muffins

Yum! Not usually a fan of muffins... and the chocolate ones always seem claggy and gross and I imagine it all wadded up in the back of my throat, unable to be swallowed. Ick.

These ones, however, are light and delicious and what's even better - they have healthy fruit in them! And anywhere I can hide fruit in food is a winner in my book.


At first bite you taste the lemon and you're all "oh.. that's a weird flavour"... and then it hits you how good it is. Particularly paired with the vanilla-y batter and sweet raspberry. And then you realised you freaked out for nothing.

Makes 12 muffins

Ingredients:

1 cup milk

1/2 cup butter

1 1/2 teaspoons lemon zest (you could use orange)

1 1/2 teaspoons vanilla

2 large eggs

2 cups self-raising flour

3/4 cup sugar

3/4 teaspoon salt

1 1/2 cups fresh or frozen raspberries. Frozen won't make your batter that unpleasant shade of purply-grey.

Method:

1. Preheat oven to 200C/400F, line twelve muffin cups with paper liners.

2. Combine first 4 ingredients in a bowl and microwave until melted. You could also do it over low heat in a saucepan. When warm, beat in eggs.

3. Add flour, sugar and salt and mix until just blended.

4. Divide batter equally among muffin cups, and bake until golden and tester comes out clean, about 15-20 minutes.


Recipe adapted from here

Pizza!

I hate getting my hands dirty... which means making pizza dough, scones, shortbread, and anything in the kitchen I actually have to stick my fingers into and squish around is a rarity.

I also get nauseated and slightly itchy when I see people like Jamie Oliver tossing dressed salads with his hands, and people that unnecessarily stir stuff without spoons.

Having said that, making your own pizza dough makes the pizza amazing and wonderful and not like you've eaten cardboard/lead/construction paper/a pillow. Therefore it is worth it.


This particular pizza dough recipe is another happy accident. It is light and fluffy, and a perfect base for some hefty veggie pizza ingredients. I used to use a recipe given to me by a Home Ec teacher once upon a time when I was a teacher aide. She used it with the students all the time, as it was impossible to mess up.

I planned to share that recipe with you, dear readers, when to my dismay I realised I'd misplaced it. Somewhere among the thousands of printed recipes that are neatly collated into colour-coded sections in folders, it had gone missing. Perhaps it was because I made it so much I kept the recipe on the refrigerator, and we do live in a very windy area.

So I searched for another recipe, and boy, I'm glad I did. This one's a keeper, folks!

Now before you yell at me for my poor choice of olives, just hang on a second. I too like proper olives and believe they are the only ones that should exist. But how old school do these babies look? I love their fakeness!

Ingredients:

7g sachet dried yeast

1 teaspoon caster sugar

1/2 teaspoon salt

2 cups plain flour

2 tablespoons olive oil

3/4 cup warm water

Method:

1. Combine the water, yeast, sugar and salt in a bowl. Whisk with a fork to dissolve. Cover with plastic wrap and set aside for 5 minutes or until slightly foamy.

2. Add flour and oil, mix to form a soft dough.

3. Turn onto a lightly floured surface. Knead for 10 minutes or until elastic. Place in a lightly greased bowl, cover and stand in a warm place for 25-30 minutes (the dough, not you!), or until the dough has doubled.

4. Use your fist to punch down the dough. Go on, it's fun. Knead on a lightly floured surface until smooth.

Recipe from here.

Sunday, May 16, 2010

The ultimate corn chowder

Now that it's getting "cooler" in South-East Queensland (I know, 14C/57F is positively frosty, right?) it's time for SOUP!

And not just any old soup - some lovely, hearty "meal in a bowl" type of soups just bursting with flavour.

Enter the Corn Chowder of a Lifetime. Soup has never made me so happy.


Ingredients:

3 ears fresh corn

2 tablespoons butter

1 medium onion, cut into 1/2 inch dice

1/2 large red bell pepper/capsicum, cut into 1/2 inch dice

1 sprig fresh thyme, leaves removed and chopped

1/2 teaspoon ground cumin

1/8 teaspoon turmeric (can be omitted)

2 potatoes, peeled and diced

3 cups stock

salt and pepper

2 teaspoons cornflour, dissolved in 2 tablespoons water

1 cup cream

2 tablespoons thinly sliced green onion

Method

1. Husk the corn, removing all the silk, Cut the kernels from the cobs and place into a bowl. Reconcile with yourself that the little kernels will ping off everywhere and you'll find some under the fridge six months later. It happens. You can always cut the corn inside the bowl, so it catches most of the errant kernels.


2. Using the back of your knife, scrape down the cobs over the bowl.


3. Heat the butter in a large pot over low heat and add the butter, onion, belll pepper/capsicum, thyme, cumin and turmeric. Saute, stirring occasionally about 8 minutes until the onion and pepper are tender, but not browned.


4. Add the corn kernels, potatoes and stock. Bring to a boil, cover, and boil 10 minutes.


5. Use the back of your spoon to mash some of the potatoes against the side of the pot, or give it a good smoosh with a potato masher.


6. Reduce the heat to medium and season with salt and pepper.


7. Stir in the cornflour mixture and slowly pout in the pot, stirring constantly.


8. When the chowder has come back to the boil and thickened slightly, remove from the heat and stir in the cream.


9. Serve with the sliced green onions on top.


Recipe adapted from here. You can even see how much I loved it in the comments section...

Haloumi, tomato and green bean salad.

Haloumi is one of the single greatest foods on this great earth. It. Is. So. Delicious. It. Should. Be. Illegal.

But darn, I'm glad it isn't. Because then I would cry, and I go all red and blotchy when that happens, and that's just not going to be fun for anyone.

Being one of the extremely odd minority of westerners, I don't like chocolate. Sure, I eat it occasionally, but it's pretty infrequent, and I rarely, if ever crave it. Now haloumi, on the other hand... that is what I dream about. Haloumi, a good stilton, a sharp gruyere... these are guaranteed to get me excited and behave like a complete freak at the buffet table.

It's not pretty, folks.

But moving on, its pan-seared goldenness paired with its salty and smooth molten interior makes me weak at the knees, and constantly trying to figure out a way to insert it into other, unsuspecting foods. This is where this salad was born.


Ingredients:

1 block haloumi, diced

1 tomato, diced

1 handful green beans, topped and tailed and blanched in boiling water for 2 minutes

Juice of 1/2 a lemon

drizzle of olive oil

pepper

Method:

uh... mix it!


I served it recently with some "chicken" soy fillets that I'd marinated in the other half of the lemon's juice, a clove of garlic and a teaspoon of fresh oregano, chopped. Then I fried it. And it looked like this:


And it was good.

Saturday, May 15, 2010

Miss Jessica Watson

I was one of the many well-wishers on the rock wall in Mooloolaba waving Miss Jess off all those months ago, and the excitement was palpable. I got to speak to her and her family before she set sail, and it was an amazing experience to be amid the whirlwind of her leaving. I was so excited for her then, and am overjoyed for her now... if nothing else, it's certainly an example of setting a goal and sticking it out to the end, no matter what. And that is to be commended.

You can read all about it in the article I wrote for the Sunshine Coast Daily about her farewell here.

Yay Jess!!

Friday, May 14, 2010

Bloggers Without Makeup

Here it is folks - my part of the Bloggers Without Makeup movement today, thanks to the genius of Jodie over at Mummy Mahem.

I couldn't have been much more honest with my 30-year-old face - it was 10pm, I'd just taken my makeup off and I was under the most unflattering fluorescent light known to man.

I had spent the day driving 45 minutes to work, working all day, then spending a lovely, noisy, messy, chaotic and fun evening with my sister and her two small kids, her husband and my brother. She's moving house, so I went to see the new place, bathed the kids, had dinner, and sat around chatting and laughing before driving the 30 minutes home.

Behold:


I particularly enjoy the shininess thanks to moisturiser and the aforementioned flourescent light.

So don't be afraid - get out there au naturel and enjoy being part of the ___________ Without Makeup craze! (Enter your own noun, everybody's doing it...)

Thursday, May 13, 2010

Egg yolk flower

How pretty is this egg yolk accident?! I was making friands, which require a scandalous amount of egg whites, and didn't want to waste the yolks. so I put them in a little bowl, and they obligingly arranged themselves into a pretty picture.

Monday, May 10, 2010

Creamy sundried tomato and roasted pumpkin pasta

If you're watching your weight, I'm sorry.

If you don't like rich, flavourful food, well, I'm sorry for that too.

If you don't like easy pasta dinners, then you're nuts.


Ingredients:

1/2 cup sundried tomatoes

200g pumpkin, cut into small cubes

1 cup stock

200ml cream (I used light.. )

pepper

fresh basil leaves

penne pasta

Method:

1. Put the pumpkin in a tray and spray with oil. Bake in preheated, fairly hot oven (200-210C) for 15-12 minutes until cooked. I was in a hurry and threw them under the grill/broiler for a few minutes each side.

2. Prepare pasta according to packet directions.

3. Meanwhile, simmer chopped sundried tomatoes in the stock about 10 minutes until plump. After 5 minutes, add the cream and pepper.

3. Add pumpkin to cream mixture, and tear basil leaves over. Stir to mix.

4. Pour over the pasta.

Stupidly easy caramel tarts.


I almost feel bad posting this, as it's so easy. But everybody needs to know they exist! They are that good.


1. Warm some Arnott's Ginger Snap biscuits in a warm oven in each hole of a patty pan/cupcake/mini muffin tin until soft, then push them down with a spoon to create a cup.

2. Open a can of Nestle's Caramel Top N Fill and dump the contents into a bowl. Microwave for a few seconds until smooth.

3. fill shells.

4. Pretend to your friends you spend hours hand-crafting them.

Lemon tarts

Perfect for a tea party!

Or a Tea and Wii party!


See? dainty little  shortcrust pastry cases with the sweet-tart smoothness of homemade lemon curd.

deeeeelicious!

Ingredients:

Crust: 
1 1/2 cups plain flour

1/8 teaspoon salt

1/2 cup butter, room temperature

1/4 cup white sugar

1 egg, lightly beaten

Lemon Curd:

3 large eggs

1/3 cup fresh lemon juice

3/4 cup sugar

4 tablespoons butter, at room temperature and cut into small pieces

1 tablespoon lemon zest


Method:

Lemon Curd:

1. In a bowl placed over a saucepan of simmering water, whisk together the eggs, sugar and lemon juice until blended. cook, whisking constantly until the mixture becomes pale and quite thick, about 10 minutes.

2. Remove from heat and whisk the butter pieces in until melted.

3. Add lemon zest and cool.

Shortcrust Pastry:

Preheat oven to 200C.

1. In a bowl, cream together the butter and sugar until light and fluffy.

2. Gradually add the beaten egg, until just incorporated.

3. Add flour and salt and mix just until it forms a ball. Don't overwork or the pastry will be hard.

4. Flatten into a disc, cover and refrigerate 30 minutes until firm.

5. Roll dough out on a lightly floured surface until about 3mm thick (mine was way thicker... was in a hurry! but worked really well with the amount of lemon curd). Keep lifting and turning to prevent sticking, or roll out on greaseproof/waxed paper.

6. Cut with a pastry cutter to whatever size your muffin pan is, and gently place in the holes.

7. Bake the pastry cases for 10-15 minutes until lightly browned. Cool.

8. Fill with lemon curd.

9. Wipe your hands before touching the Wii remote.


Recipe adapted from Joy of Baking.


Little Lemon Tarts

Saturday, May 8, 2010

Tea and Wii

Just a little teaser for some recipes coming up soon... I had the lovely Bec and her partner over from Gay Fourth and Multiply over for some wine, some Wii, and some homebaked treats with tea.

Thursday, May 6, 2010

Tres Leches Cake

Oh yes. Yes it is. It's The Pioneer Woman's famous cake.

When I saw that post for the first time, I wanted to cry. I've never wanted to eat a cake so badly in all my life.

A sponge (only cake I'll eat) soaked in sweetened condensed milk (the only sweet food that turns me into a voracious spoon-licker)... a match made in Veggie Mama heaven. In fact, if there was a heaven, this is all they would serve. And every television would be running Monty Python's The Meaning of Life continuously. Ahhhh.

I am keeping the recipe written exactly as it is on PW's site, but have removed all the unnecessary capital letters cos they make me itchy.

Ingredients:
1 cup all-purpose flour
1-1/2 teaspoon baking powder
1/4 teaspoon salt
5 whole eggs
1 cup sugar, divided,
1 teaspoon vanilla
1/3 cups milk
1 can evaporated milk
1 can sweetened condensed milk
1/4 cups heavy cream
_____
FOR THE ICING:
1 pint heavy cream, for whipping
3 tablespoons sugar

Preparation Instructions

1. Preheat oven to 350 degrees (non-US darlings, 180C). Spray a 9 x 13inch pan liberally until coated.

2. Combine flour, baking powder and salt in a large bowl. Separate eggs.

3. Beat egg yolks with 3/4 cup sugar on high speed until yolks are pale yellow. Stir in milk and vanilla. Pour egg yolk mixture over the flour mixture and stir very gently until combined.

4. Beat egg whites on high speed until soft peaks form. With the mixer on, pour in remaining 1/4 cup sugar and beat until egg whites are stiff but not dry.

5. Fold egg white mixture into the batter very gently until just combined. Pour into prepared pan and spread to even out the surface.

6. Bake for 35-40 minutes or until a toothpick comes out clean. Turn cake out onto a rimmed platter and allow to cool.

7. Combine condensed milk, evaporated milk and heavy cream in a small pitcher. When cake is cool, pierce the surface with a fork several times. Slowly drizzle all but about 1 cup of the milk mixture - try to get as much around the edges of the cake as you can.

8. Allow the cake to absorb the milk mixture for 30 minutes.

9. To ice the cake, whip 1 pint heavy cream with 3 tablespoons of sugar until thick and spreadable. Spread over the surface of the cake. Decorate with whole or chopped maraschino cherries. Cut into squares and serve.


Now as you can probably tell, my milk mixture didn't sink all the way to the bottom of the cake, which is what you are aiming for. I didn't have a big enough rimmed platter, so was worried I'd lose most of the milk to the bench, the floor and the surrounding houses.

It was just one of those things.

Still tasted amazing, though... and look how pretty it is when you mix the batter with the whipped egg whites:


Salsa

Perfect to go with Mexican Lasagna, right? Yup.


Ingredients:

2 ripe tomatoes chopped fairly small

1/2 red onion, chopped fine

1 jalapeno, seeded and minced

1/2 bunch coriander, chopped roughly

Juice of 1/2 to 1 lime

salt to taste


Method:

1. um... mix it!


You know what else is good? mixing a bit of this with an avocado, extra salt and garlic for guacamole.

Mexican Lasagna

This is a big hit. Everybody loves Mexican food, right?

And seeing yesterday was Cinco de Mayo, I wanted to make a Mexican feast to celebrate. I'm like that.

Any excuse for cooking will do. You got a promotion? I'll make a cake. Found a pair of shoes you love? Celebratory cookies for you. Other countries' national holidays? I'm right there with the pumpkin pie.

It doesn't photograph well, but it tastes damn good and is super-easy. Can be doubled.

Ingredients:
1 packet veggie soy crumbles (I use Sanitarium Veggie Mince)

1 can refried beans

1/8 teaspoon each of basil, garlic powder and cumin

1 jar salsa

1 1/2 cups cheese

four tortillas


Method:

1. in an oiled pan over medium heat, break up the crumbles.

2. sprinkle over the herbs and spices, and add a tablespoon or two of salsa.

3. Mix in the refried beans.

4. Spray a square casserole dish with oil, spread over another tablespoon of salsa. Lay one tortilla on top.

5. Put half the crumble/bean mix on, top with 1/3 salsa and 1/3 cheese.

6. Repeat.

7. Top with tortilla, the rest of the salsa and the rest of the cheese.

8. Bake in a 180C oven for 30-45 minutes, until heated through and cheese is bubbling.

Arrriba!

Wednesday, May 5, 2010

Buttery Scones


There is basically two schools of thought on scones - you're either on the dense, buttery side, or you're on the light and fluffy side.

Or you can be me, who is on the side of a magical, mythical scone that is both light and buttery, and exists only in my dreams.

For today, indulge in the buttery scone. The kind that literally melts in your mouth and mingles with the indulgent chantilly cream. I will deal with the light and fluffy later.


Quick - somebody put the kettle on!

Ingredients

2 1/2 cups self-raising flour (or the same of plain flour with 1 tablespoon baking powder added)

1/2 teaspoon salt

125g butter, grated (I used a wee bit more for extreme melting texture)

1/4 cup sugar

2/3 cup milk

Method:

1. Heat oven to SUPER HOT... we're talking 275C... that's the highest my oven goes, anyway. You want these babies to rise fast and cook through.

2. Put flour and salt in a large bowl and stir to mix.

3. Add butter and rub in with your fingertips until it looks like breadcrumbs, or sand (picture follows, because I always used to be concerned I wasn't doing it right). You could also use a pastry cutter, but I've never had one.

4. Add sugar, toss to mix.

5. Add milk and mix slowly - I used to use two knives and cut in opposite directions as you really don't want to over-work the dough. Now I just gently use a fork until the dough just holds together.

6. Sprinkle some flour on your workspace and put the dough on top. Press out gently until the dough is about 1cm thick.

7. Dip your scone cutter (I use a glass) into the flour and cut out into rounds. Give the rounds a little squeeze and a spin to puff them up a bit to help them rise. (pictured below)

8. Lay them on an ungreased baking tray quite close together. this helps them rise up instead of out! Brush the tops with milk.

9. Bake in super hot oven 10-15 minutes until brown and the bottoms sound hollow when tapped.

10. Top with jam and so much cream you can barely see what is underneath. Oh... is that just me?


Monday, May 3, 2010

Chilli Thai Stir Fry

Don't you love it when you go to make a dinner and you're missing a vital ingredient?

Some of my most memorable meals come from me making do after finding my pantry lacking in necessary items.

Hence, instead of making a honey-soy sauce for my stir fry last night, I ended up making some kind of chilli Thai concoction... and it was glorious.

Observe:


Ingredients:

1/2 cup Ketjap Manis (sweet soy sauce)
1 tablespoon rice wine vinegar
pinch salt
1 teaspoon cornflour mixed with 1 teaspoon water
1 chilli, finely sliced
juice of one lime
handful coriander, chopped

Mix all in a bowl.

Easy peasy! You can add garlic, but I stir fried my vegetables in it and that was enough... in fact, I recommend that, it adds such a depth of flavour to the veggies. Delicious :)

Family Fondue

Fondue gets me excited - I mean, I really love melted cheese that I can dip things in and overload on.

Which is why real fondue makes me cry. It's too kirschy and not anywhere near creamy enough for me. Or small children, for that matter.

So, for board game nights or Sunday evening dinners, there's nothing better than a pot of creamy cheese sauce and crusty bread. in my house, anyway.


It's basically a cheese sauce that you would make an au gratin from... over-cheesed into creamy fondue. Yay!

Ingredients
1 tablespoon butter
1 tablespoon flour
1 cup milk
2 cups swiss cheese
2 cups gruyere cheese
1/2 tsp mustard
salt to taste

Method
1. Melt butter in a pan over medium heat

2. Add flour and cook 1 minute. This helps get rid of the raw flour taste.

3. Add milk and whisk vigorously for a bit... you don't want any lumps!

4. Bring to a boil, stirring often.

5. When thick and bubbling, add cheese a cup at a time, waiting until it's fully melted to add more.

6. Add mustard powder and salt at any time.

7. You could also drop in a dab of garlic.... yum!

I serve mine with cheese, blanched veggies, gherkins and those little cocktail onions.

Addthis Sharing Gadget